My first ever blog post, this is so exciting! I want this blog to be a diary of me and my family and what we become. My husband and I are looking desperately for a nice home to raise our beautiful five month old baby girl in. As we've been scouring Central New York for a home that we love, I've been collecting projects and ideas for our future residence. This blog will journey us from finding the one simple MLS listing and taking it to the place where all our future memories will be made. Before we get there I'll share thrifty finds and crafts in the making, not to mention recipes! I cant let my degree in restaurant management go to waste.. :) Anyway, to the post!
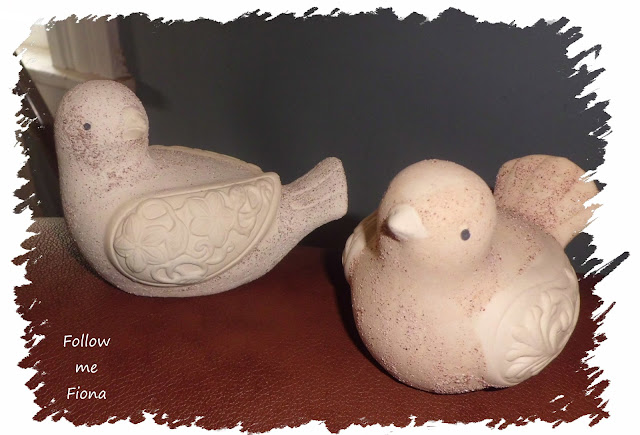
I was shopping at the dollar store this week and I spotted these cute stone birds. I loved the details on their wings, only I wasn't digging their
sandpapery feel and reddish tint. So I decided to give them a new look.
Out came the sand paper to
give them a smooth(er) finish. Let me tell you, it was the worst
sound/feeling in the world, the red bumps were like grains of sand superglued onto this bird. It took a lot longer than expected, the whole time I was praying my baby didn't wake up.
I probably should have used a rougher
sandpaper, but I only had 100 grit on hand. After giving those babies a sanding I took them out to prime.
After I primed them with Krylon Primer, and ten minutes later sprayed them with Krylon Ivory in gloss and left them outside to dry.
Once they were dry I brought them inside and started my distressing. To distress them I used Valspar clear mixing glaze from Lowes. It was 17$ for a quart, and I'm pretty sure that quart is going to last me a lifetime, you really need so little to glaze projects. I mixed it with a brown acrylic paint I got from Walmart for 94 cents. I did this on an old magazine while watching Burn
Notice. Seriously, does anyone else watch this show? It's so good.
Anyway... See how little I needed?
This is a teeny plastic cup, and it was enough for both birds
Glazing is so simple and it really helps bring out details. All you do is paint some on, I used a regular craft brush, and then wipe off the excess with a rag.
At this point I realized I wished I had left them a bit rougher, it was almost too smooth and the glaze didn't have enough crevasses to fall into. Here's one after one coat of glaze.
I did another coat of glaze, and left more on them. After the glaze dried I finished them by sanding them one more time, just to add a little more distressing.
I think they came out real cute,and they look ceramic-(ish)! They don't have a home yet, mainly because half my house is packed in boxes to prepare for the move, but they'll sit on my mantle until they (we!) find a new home.
Overall the birds cost me 3$, the only thing I did not have on hand was the light brown paint. Pretty good deal at a $1.50 each!
Should I paint on eyes? What do you think?
Tootles!


OMG They came out AMAZING!! I think you should make a small brown dot for the eyes ... this way they can see where they are going.
ReplyDelete