Glazing is such an awesome tool to have in your arsenal of DIY tricks, and it's so easy. The goal of glazing is to make your furniture, frames, nick-knacks, (whatever you want) look old and imperfect!
Here's what I'll be glazing today
Super cute lamp I was so lucky to have gotten from my Mom for free! It has been in her basement for years! It was in excellent condition, just a little dirty.
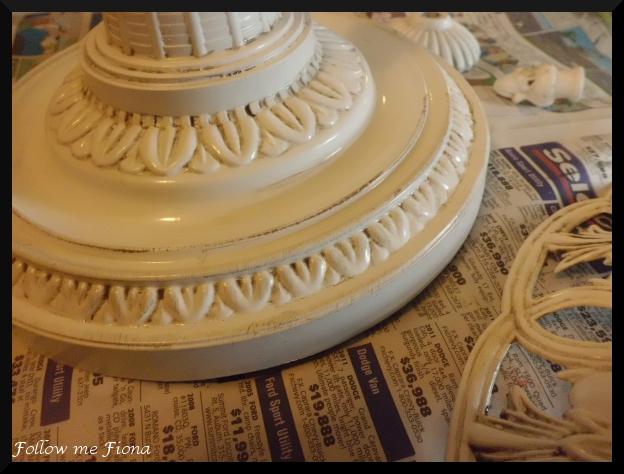
First, you'll want to wash and dry what you'll be glazing. If needed, prime and paint in your desired color. I just stuck with the white, but sprayed it again with Krylon Gloss White for a nice even finish. Here's my lamp taken apart and ready to be glazed
Baby Fi supervised the project along with Carl the caterpillar and Issac the sheep.
At Lowes they can tint a quart or gallon of glaze for you, or you can buy glaze that is already tinted. I find having the clear allows me the freedom to make whatever color glaze I want. This quart goes a LONG way, so there's no reason to be stuck using only one shade on all my future projects.
For the glaze I used Valspar's Clear mixing glaze, I found it in
Lowes for $17. I like it because I can tint it whatever color I want.
At Lowes they can tint a quart or gallon of glaze for you, or you can buy glaze that is already tinted. I find having the clear allows me the freedom to make whatever color glaze I want. This quart goes a LONG way, so there's no reason to be stuck using only one shade on all my future projects.
For
this lamp I wanted my glaze to be a brownish-black. So I mixed about
4 parts glaze to 1 part brown and black paint mixed together. This is a
rough estimate, I did not measure it.
Also keep in mind that when the glaze is wet it is going to appear slightly lighter than it is going to dry.
If you are using a different brand follow the manufacturers instructions for exact mixing terms, although it will probably be very similar
If you are using a different brand follow the manufacturers instructions for exact mixing terms, although it will probably be very similar
Latex paint is recommended to use for the tint, but I used acrylic craft paint because it is what I had on hand, and it worked just fine.
Here is the top of my lamp before I started glazing
Paint on your glaze using a regular brush. Get into the nooks and crannies you want highlighted the most
Wipe away the excess with a rag (or your husbands old (clean) sock - I swear its clean, it just looks gross lol)
Its very easy, but I made a short video to show you how I do it. I'm painting in one hand and holding the camera in the other, so the camera shakes a little, sorry :)
Yes that's Fiona cooing in the background
If you've wiped too much of your glaze off, simply go back and apply another coat. The glaze is slow drying, so you have lots of time to achieve your desired look.
After I've applied and wiped my glaze I like to go back over and "dry brush"
Here I take a foam brush, $1 at Walmart, add a little glaze and then pat most of it off onto a rag.
Then I simply brush on where I want some added detail. This looks nice on raised edges where your rag probably wiped clean.
You can also dry brush wherever you want some light highlighting.
Here's my lamp all finished. If you wanted to add more dimension you could also give it a light sanding at this point, I left my lamp the way it is.


I enjoyed reading your blog. Your pictures are very good and the instruction are clear. Great job and a lovely family
ReplyDeleteThis comment has been removed by the author.
DeleteThank you!
DeleteThank you for you tutorial with glaze! I needed it!! Love your blog and that "squishy" face of your precious daughter!
ReplyDeleteThank you for your kind comment! Even though you posted this six months ago :) I've just decided to start up blogging again sorry for the late reply!
Delete